How To Setup A Simple Webpack and Babel Server From Scratch.


I am currently learning web development and trying to understand the basic concept of it. So I decided to learn how to setup up simple servers for my frontend applications instead of using frameworks like react, angular or vue.
Today, we will setup Webpack and Babel from scratch. Webpack is used for bundling our source codes from development to production, which can be served to the client. Babel is used for compiling ES6, ES7 and ES future into ES5 as most old browsers do not support Javascript codes above the ES5 version.
Now, let's get into it. Firstly, a list of the packages we will need: webpack, webpack-cli, webpack-dev-server, @babel/core, @babel/preset-env, babel-loader, @babel-polyfill, @babel/plugin-transform-runtime, html-webpack-plugin, css-loader and style-loader.
STEP 1:
SETTING THE PROJECT FOLDER
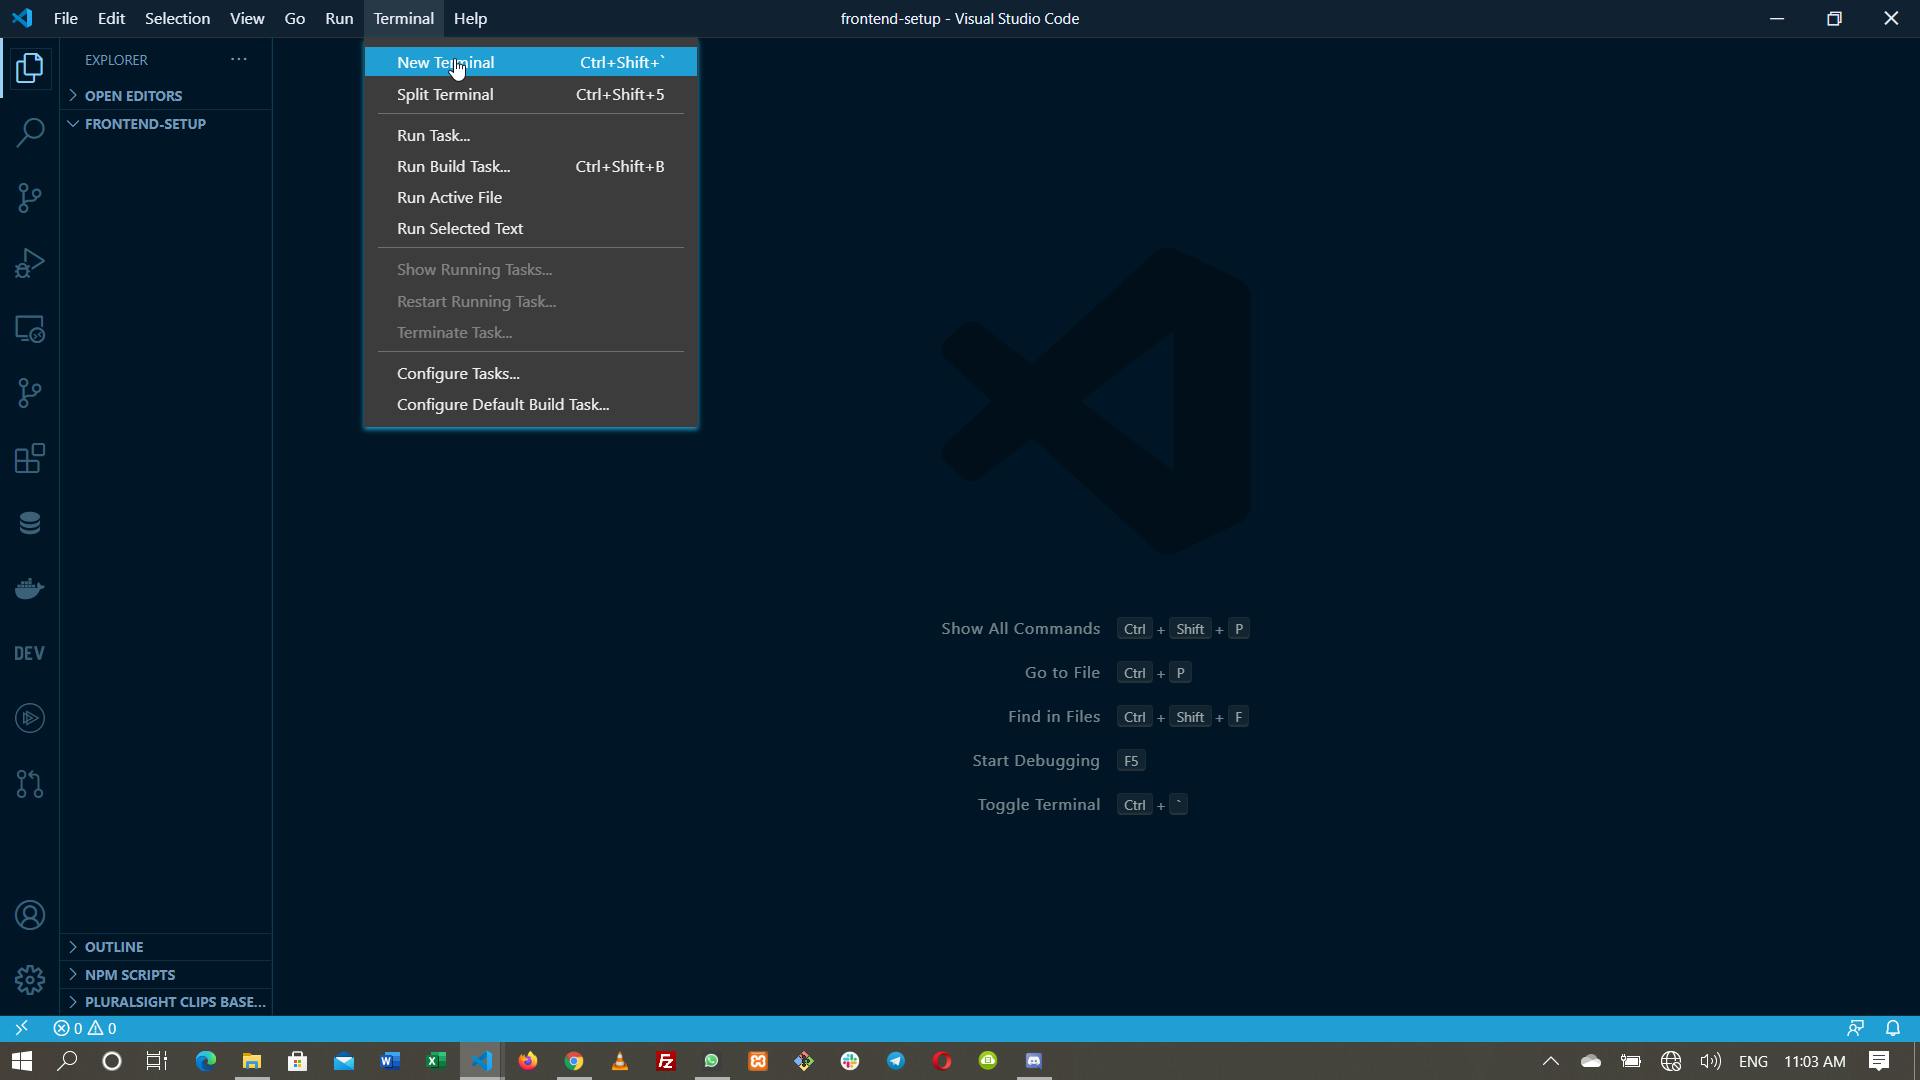
Create a folder on your desktop and call it frontend-setup; right-click on the folder and select open with code to open the folder in vs code.
Once the folder is open, click on terminal and select new terminal.
In the terminal, type
npm init
to initialize the node package manager. npm init creates a package.json file that allows you to setup common features like package name, version, description, e.t.c.
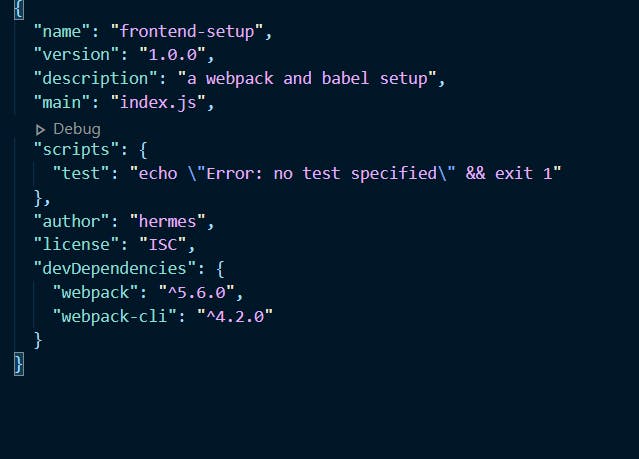
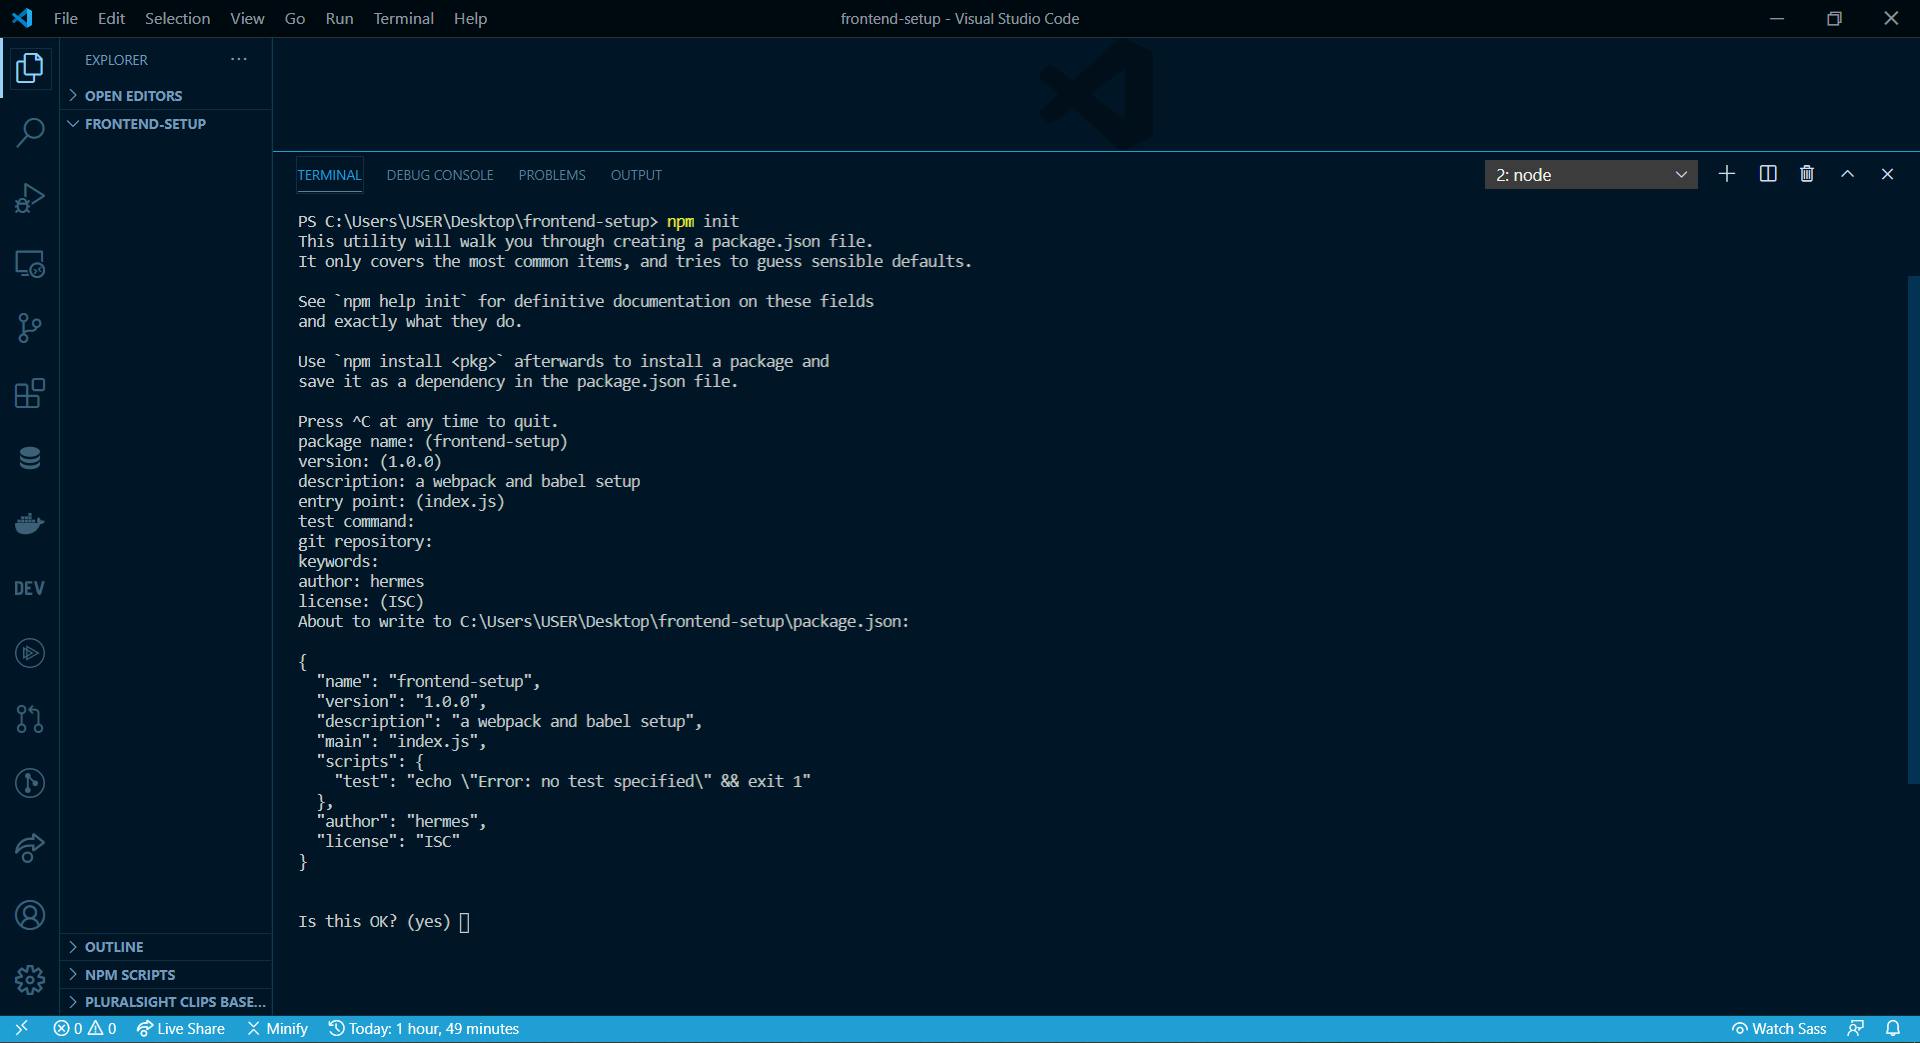 In package name: (frontend-setup); leave it as frontend-setup, version is mostly (1.0.0), in description: , give a little insight of what you are building, leave the entry point as index.js, leave test command:, git repository:, keywords: empty as they are not too important at this stage. put your name as the author, leave license:(ISC). Press enter to create the package.json file.
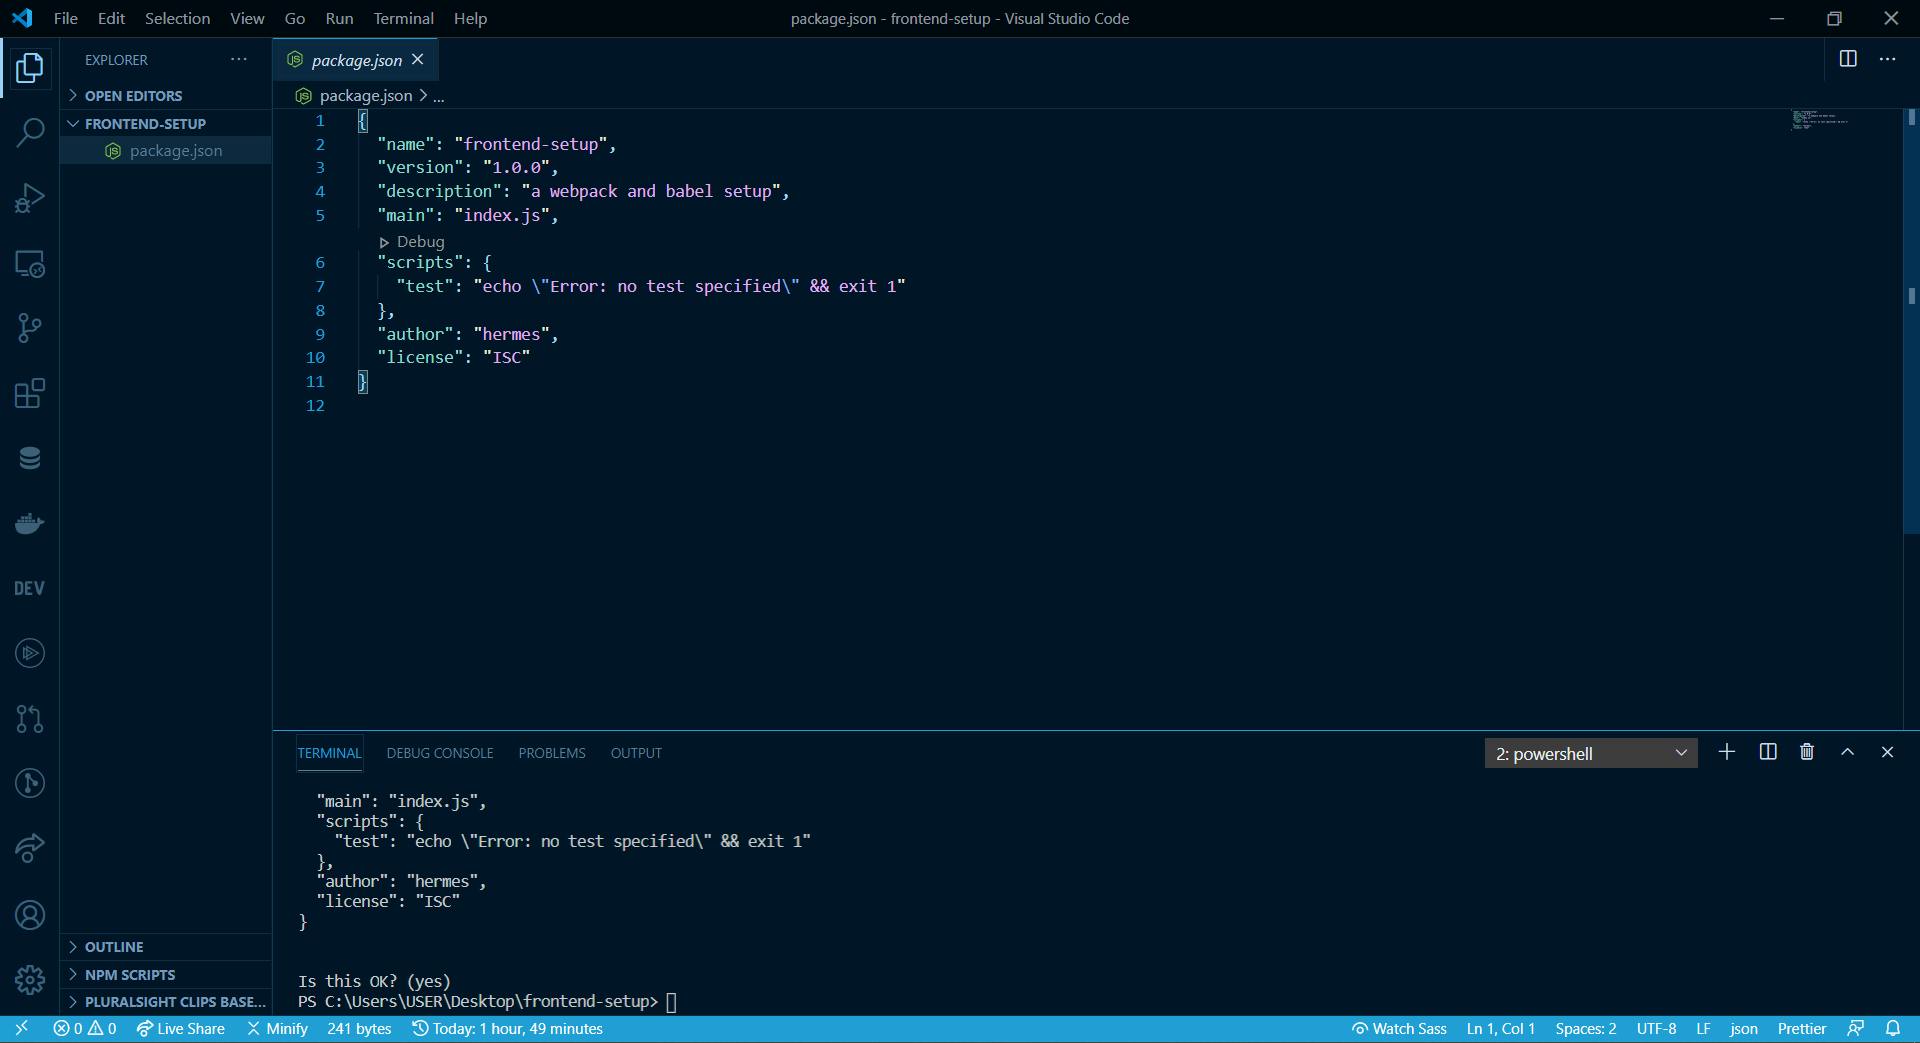
When you open package.json, you will get something like this:
 We are done with the first step.
STEP 2
CREATING SUB-FOLDERS AND INSTALLING WEBPACK PACKAGES
Inside the frontend-setup folder; we create two folders; dist and src respectively, inside each of them, we create a js folder.
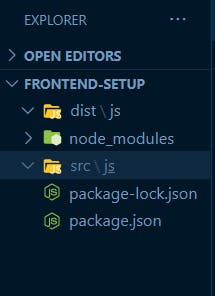 Now, inside the js folder in the dist folder i.e dist/js, we create a bundle.js file. Inside the src/js we create an index.js file.
 Now we will have to npm install most of the packages.
First we install webpack and webpack-cli.
In the terminal write
Now we will have to npm install most of the packages.
First we install webpack and webpack-cli.
In the terminal write
npm install --save-dev webpack webpack-cli
note: --save-dev will save our package as a dev-dependency which means we only need them during development. Using only --save will save them as both development and production dependencies.
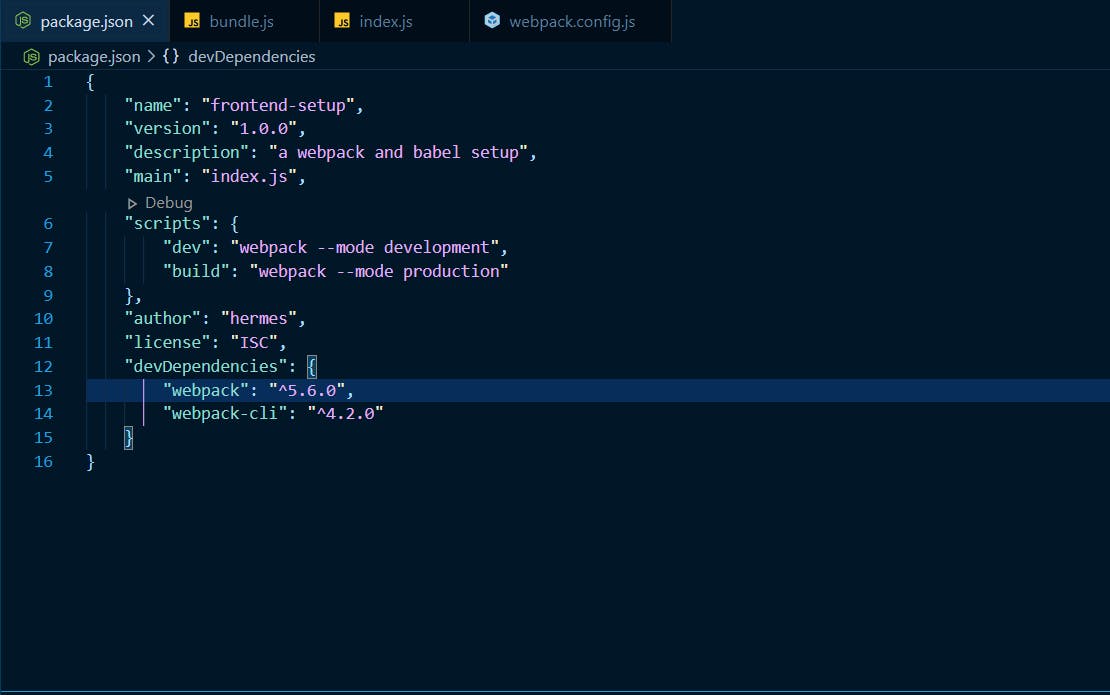
If our installation is successful, you will get the webpack and webpack-cli jsons under devDependencies inside our package.json
Next we create a webpack.confing.js file inside our frontend-setup. In the webpack.config.js file, we import path like this
const path = require('path');
path is a nodejs module that allow us to move through file directories.
Then we export the path module in object format
const path = require('path');

module.exports = {

}
Inside the module.exports, we define the mode: 'development', entry: './src/js/index.js', output:{path: path.resolve(__dirname, 'dist'), filename: './js/bundle.js'}. So we will have our setup like this inside the
webpack.config.js
const path = require('path');

module.exports = {

    mode: 'development',
    entry: './src/js/index.js',
    output: {
        path: path.resolve(__dirname, 'dist'),
        filename: './js/bundle.js'
    }
}
Now goto package.json inside "scripts":{ }, change "test" to "dev" and change "echo \"Error: no test specified\"&& exit 1" to "webpack --mode development". Also add "build":"webpack --mode production". So your package.json will look like this:
Next we install webpack-dev-server
npm install --save-dev webpack-dev-server
webpack-dev-server enables us to run our app in localhost live server.
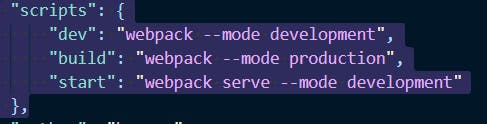
Now if you goto your package.json file, you will see that webpack-dev-server has been added as a devDependency. Inside scripts, add "start": "webpack serve --mode development". This is because we are only using the localhost live server for development, when we deploy to production, we won't need it anymore. Your scripts section will now look thus:
Next, goto webpack.config.js and configure the server. Create an object called devServer and add this to it:
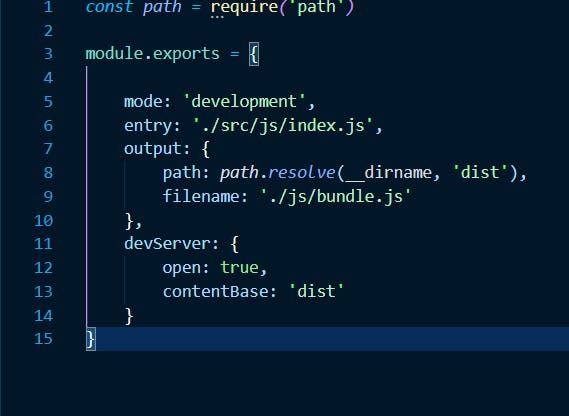
open :true tells the app to open localhost:8080 in the browser once npm run start is entered in the terminal. contentBase: 'dist' tells the app to pick it's content from the dist folder.
Inside src/js, create a test.js file. Inside the file, type
const test = "A simple server test"

export default test
Then goto src/js/index.js and import test
import test from './test'

console.log(test)
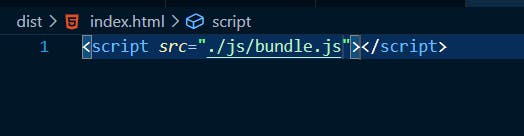
Goto the dist folder and create an index.html page. link the bundle.js file to the index.html page. So you will have:
In the terminal type
npm run dev
This will bundle all our javascript codes in the src/js/index.js to the js/bundle.js in the dist folder. If you goto to the terminal and type
start dist/index.html
your default browser will open and if you open the console you will see this:
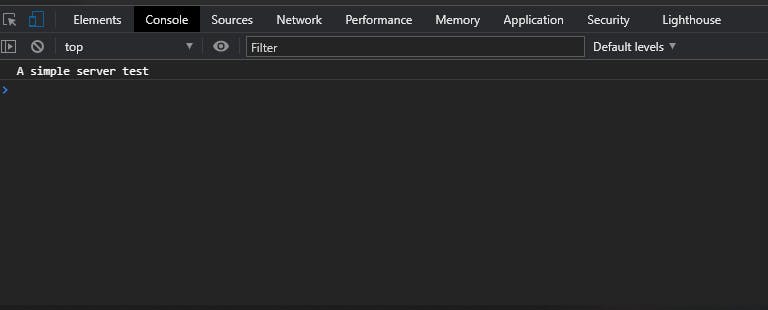
If you change the value of the test variable in your test.js and run npm run dev again then refresh the browser, the content logged to the console changes to the latest update.
But we don't want to keep run npm run dev and refreshing the browser each time we make an update to our code. We already have a webpack-dev-server installed. The next thing we will do is to install a HTML bundler plugin which will bundle the HTML from src to the index.html in the dist folder.
To achieve this, we will create a HTML page in src folder (index.html). We will setup the index.html with simple html5 codes and add a h1 title tag and a couple of other tags to display in the browser. We have something like this:
<!DOCTYPE html>
<html lang="en">

<head>
    <meta charset="UTF-8">
    <meta name="viewport" content="width=device-width, initial-scale=1.0">
    <title>Document</title>
</head>

<body>
    <h1>This is a frontend setup page</h1>
    <p>We are learning how to setup webpack and babel for frontend development</p>
</body>

</html>
Next we will install the html-webpack-plugin to help us bundle our HTML code.
npm install --save-dev html-webpack-plugin
Once we are done with the installation, we goto webpack.config.js and set it up. First, we will import the html-webpack-plugin directly below path. The html-webpack-plugin is a constructor function so we must start its variable name in caps lock
const HtmlWebpackPlugin = require('html-webpack-plugin')
Then inside module.exports, we create a new object called plugins which will take array of properties and values.
plugins:[
            new HtmlWebpackPlugin({
            filename: 'index.html',
            template: './src/index.html'
        })
]
Since html-webpack-plugin is a constructor function, we will start it with the new keyword. The filename: 'index.html' means the index.html in the dist folder, while the template:'./src/index.html is the page where we write our HTML codes.
Now in the terminal, run
npm run dev
next run
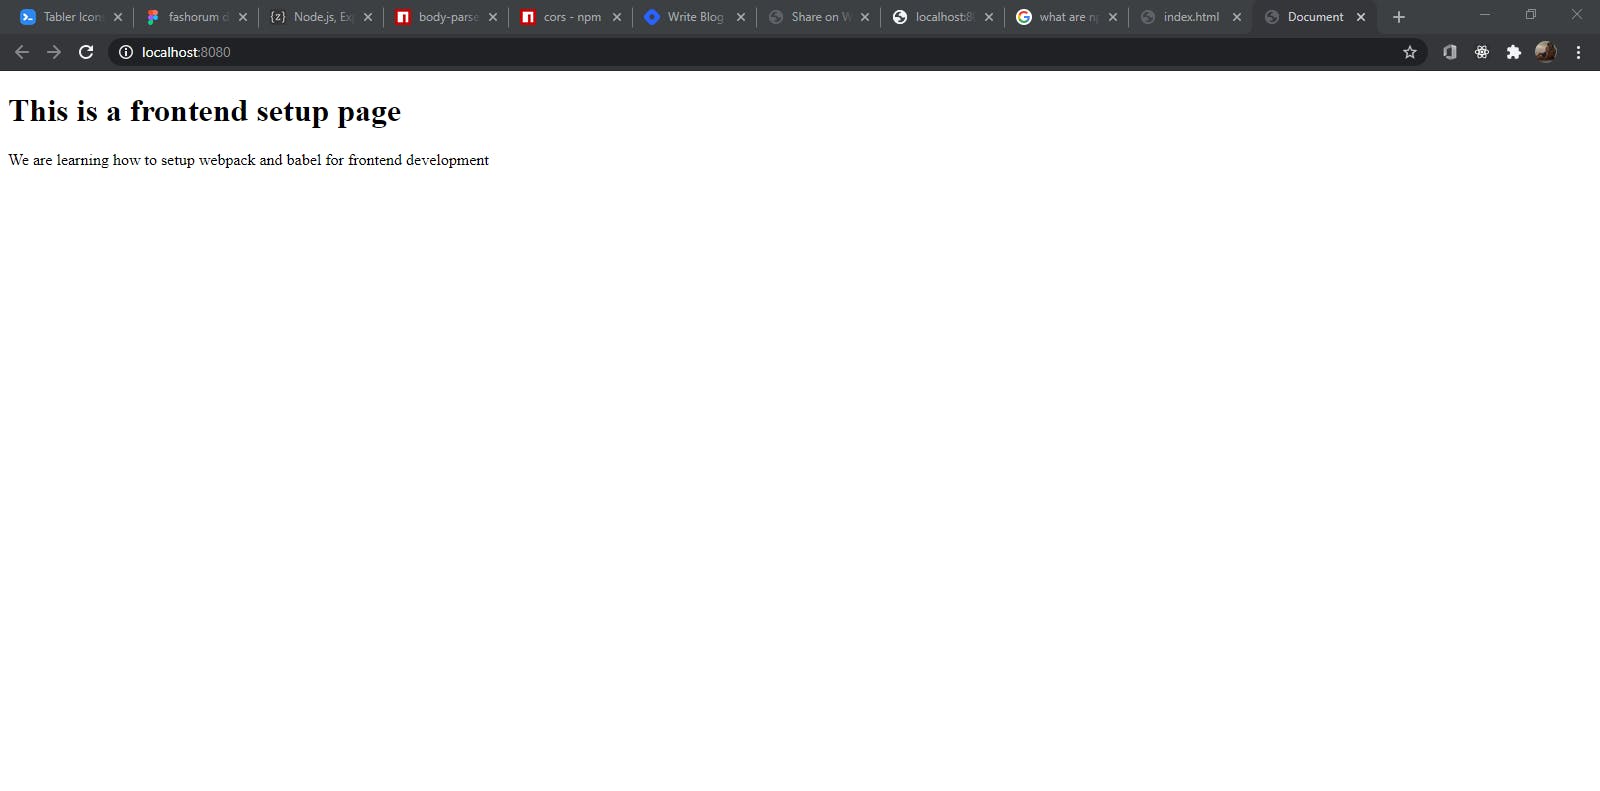
npm run start
The browser will open with localhost:8080 and we will have this
We are done setting webpack. For more on Webpack Click Here
STEP 3:
INSTALLING AND SETTING UP BABEL
In terminal, install the following babel packages
npm install --save-dev @babel/core @babel/preset-env babel-loader @babel/plugin-transform-runtime
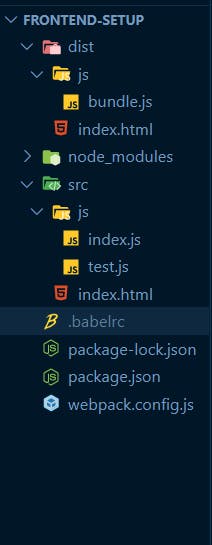
Once the installation is done, inside the frontend-setup, create a file called
.babelrc
Now your app tree will look like this:
Inside the .babelrc file, write this:
{
    "presets":[
        [
            "@babel/preset-env",
            {
                "target":{
                    "browsers":"last 8 versions"
                }
            }
        ]
    ],
    "plugins":[
        "@babel/plugin-transform-runtime"
    ]
}
Goto webpack.config.js, inside module.exports, add comma to the last object and the add this
 module: {
        rules: [{
                test: /\.js$/,
                exclude: /node_modules/,
                use: {
                    loader: 'babel-loader'
                }

            }
Babel-loader is a module, so it has some rules to follow. Rules like test, exclude are written in regex while use is written as object function. test:/.js$/ tests every javascript file in the frontend-setup app. exclude:// is used to exclude javascript files inside node_modules. babel-loader is used to load the javascript that are to be complied to ES5.
Next we install @babel/polyfill as a dependency. It is the only dependency we will still use in production, hence we won't add -dev while installing it.
npm install --save @babel/polyfill
After the installation, go to webpack.config.js, in entry, add '@babel/polyfill'
entry: ['@babel/polyfill', './src/js/index.js'],
Now we are done with Babel setup for our app. For more on Babel click here
STEP 4:
ADDING CSS AND STYLE LOADERS
To add css-loader, style-loader; we create a css file in the src folder. Call it index.css now we install the loaders to help us load our css files.
npm install --save-dev css-loader style-loader
After installation, we goto the webpack.config.js and add the css-loader and style-loader to the rules inside the module object
 module: {
        rules: [{
                test: /\.js$/,
                exclude: /node_modules/,
                use: {
                    loader: 'babel-loader'
                }

            },
            {
                test: /\.css$/,
                use: ['style-loader', 'css-loader']
            }
        ]
    }
Now, if we goto our src/js/index.js file and import css thus
import '../index.css'
Now we go to our src/index.css file and give our index.html tags some styles.
##CONCLUSION
This is the simplest way to setup webpack and babel for frontend development. It is quite a straightforward setup. It can be tricky to setup too so always look out for spelling mistakes especially in the webpack.config.js file.